
How do I use a named Style from a Theme?
Themes enable you to customize the look and feel of your dashboards by creating Styles that can be applied to your dashboard tiles. Each theme comes with a 'default' and 'active' style which are automatically applied to tiles based on if they are active or not. You can also add your own named styles to a theme and then apply those to tiles.
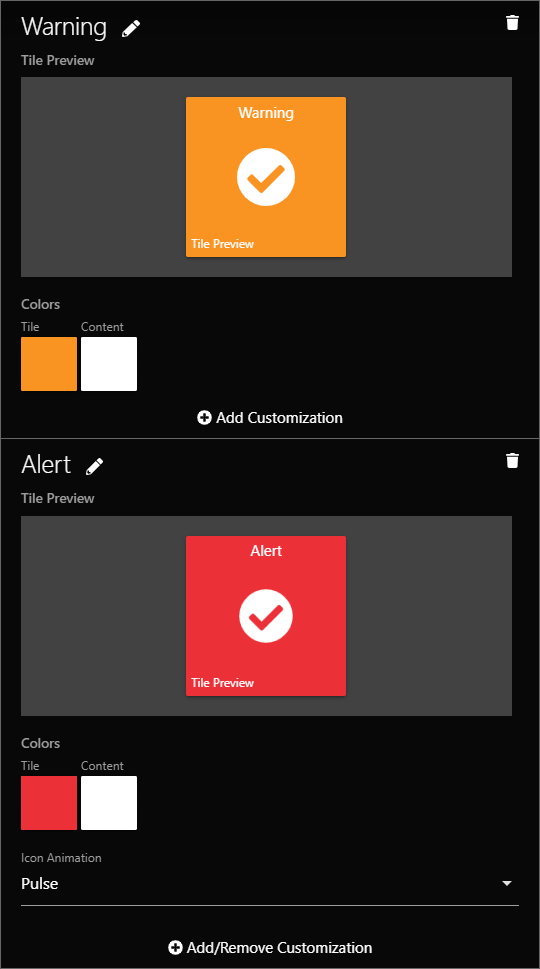
For example, you might create new styles named 'Warning' and 'Alert' - perhaps an orange background for the warning and a red background for the alert for our demonstration.
The Alert style might be a good candidate for the Icon Animation feature which can help draw your attention to a tile.
Once you have created the named styles and saved your theme, you can return to your dashboard where you can edit the tile and apply your desired style. The general process involves opening your dashboard for editing, tapping the `...` in the top-right corner of a tile and selecting Edit, and customizing the 'Style' feature for a tile.
You may either be presented directly with the option of choosing which Style you want to apply when the tile is Active and which style to apply by Default... or the tile may be using the State Mapping feature in which case you'll be given the option to customize which Style is applied for each 'state' that the device associated with the tile is in.
If you haven't already configured your dashboard to use your Theme, you can do so by tapping the `...` in the bottom-right corner of the dashboard, select Configuration, select your Theme from the drop-down, then save the Dashboard Settings.
In our example, we're using a True/False Variable tile and we will choose to keep the 'Default' style applied when the value is False and will use the Alert style when the value is True: